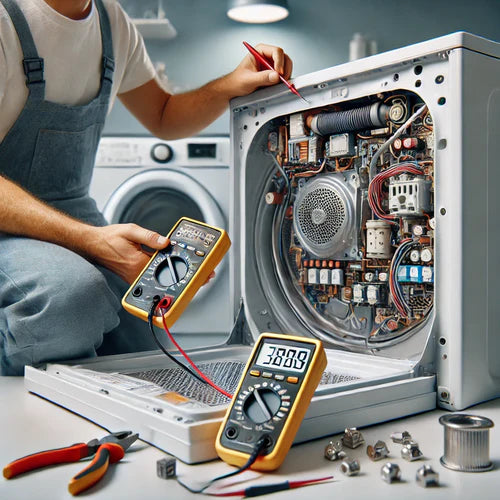
How to Diagnose and Replace a Malfunctioning Dryer Thermal Fuse
Share
A malfunctioning dryer thermal fuse can bring your laundry routine to a halt. The thermal fuse is a safety device that prevents your dryer from overheating. When it blows, your dryer may stop running altogether, or it may run without producing heat. Diagnosing and replacing a faulty thermal fuse is a straightforward process, even for DIYers. Here’s how to get your dryer back in working order.
What Is a Dryer Thermal Fuse?
The thermal fuse is a small, cylindrical component typically located near the blower housing or heating element. Its primary function is to cut off power to the dryer if the temperature exceeds safe levels. Once the fuse blows, it cannot be reset and must be replaced.
Signs of a Blown Thermal Fuse
-
Dryer Won’t Start
If your dryer doesn’t start when you press the button, a blown thermal fuse could be the issue. -
Dryer Runs But Doesn’t Heat
A dryer that tumbles but doesn’t produce heat may also have a blown thermal fuse, especially in gas models. -
Overheating
If your dryer overheats and shuts down frequently, a malfunctioning thermal fuse may need attention. -
Error Codes
Some newer dryers display error codes when the thermal fuse is blown. Refer to your user manual for code definitions.
Tools and Materials Needed
- Screwdriver
- Multimeter (for continuity testing)
- Replacement thermal fuse (available at PRS Parts Inc. in Honolulu, Hawaii)
Steps to Diagnose a Faulty Thermal Fuse
1. Unplug the Dryer
Before starting, disconnect the dryer from the power source to avoid electrical shock.
2. Locate the Thermal Fuse
Check your dryer’s user manual to locate the thermal fuse. It is often found on or near the blower housing or heating element.
3. Remove the Fuse
Use a screwdriver to access the thermal fuse. Carefully disconnect the wires and remove the fuse.
4. Test the Fuse
Using a multimeter, check the fuse for continuity.
- If the multimeter shows no continuity, the fuse is blown and needs replacement.
- If continuity is present, the problem lies elsewhere.
How to Replace a Malfunctioning Thermal Fuse
1. Purchase the Correct Fuse
Get a replacement thermal fuse that matches your dryer model. PRS Parts Inc., a trusted appliance parts supplier in Honolulu, Hawaii, offers a wide selection of thermal fuses and other dryer components.
2. Install the New Fuse
- Place the new fuse in the same position as the old one.
- Reattach the wires securely.
3. Reassemble the Dryer
Put the dryer back together, ensuring all panels and screws are securely in place.
4. Test the Dryer
Plug the dryer back in and test it to confirm the new fuse resolves the issue.
Preventing Future Issues
To avoid repeated thermal fuse problems:
- Clean the Lint Filter and Vent: A clogged vent can cause overheating, leading to blown fuses.
- Inspect the Dryer’s Airflow: Ensure proper airflow around the dryer to prevent overheating.
- Check the Thermostat: Faulty thermostats can cause overheating, so replace them if necessary.
PRS Parts Inc.: Your Local Source for Appliance Parts in Honolulu
When you need a replacement thermal fuse or other appliance parts, PRS Parts Inc. in Honolulu, Hawaii, is your go-to resource. Their wide inventory of high-quality parts covers all major brands, and their knowledgeable team is always ready to assist.
Why Choose PRS Parts Inc.?
- Local Convenience: Avoid waiting for mainland shipments by shopping locally.
- Expert Guidance: Their staff can help you find the exact part you need.
- Reliable Products: PRS Parts Inc. offers durable, manufacturer-approved appliance parts.
Conclusion
Diagnosing and replacing a malfunctioning dryer thermal fuse is a simple repair that can save you time and money. With the right tools, a bit of effort, and quality parts from PRS Parts Inc., you can restore your dryer to full functionality and keep your laundry routine on track. Visit PRS Parts Inc. in Honolulu today for all your appliance repair needs!
